 | Welcome on MOOC-invitation |
|
| New! | An invitation to practice origami | map | Discovery of the world of folding paper Learning to fold |
| Back MOOC1 | Journey 2 | Sequence 4 | <--- page 4 | page 5 | page 6---> |
 |
Using photo-diagrams |
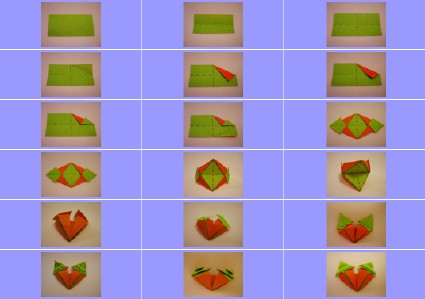
| A photo-diagram is a series of photos showing how to fold a model. We find them in a few books, and a lot on the internet. * Benefits of photos-diagrams - they are easier to do than to draw the diagrams, - they show immediately what happens from one stage to another, - they are closer to reality. * Disadvantages of photos-diagrams - the photos must be of very good quality, so that the folds are clearly visible, - the readability rules (colors, contrasts, size) must be respected. Good quality photo diagrams can complement diagrams to make them easier to understand. For an extreme example, look at a photo-diagram in video (!) photodiagram of Money Ryujin by Dat Link Quoc. Some photo-diagrams are supplemented by the signaling of the origami repertoire. They then correspond to color diagrams in addition to the diagrams. The photo-diagram that illustrates the page is an example. It is due to Yara Yagi (used with her permission). It corresponds to the folding described in the « Using diagrams » page. You can compare the two approaches! |
26 photo(s)